Browsing "Older Posts"

yo-yo christmas ornaments

By Hatun Comak → Sunday, December 23, 2018

Yo-yos are quick to make and perfect to use for a variety of things including embellishment of quilts or diy ornaments. Here I used yo-yos to make some christmas ornaments, which includes a snowman and a tree.

These ornaments were fun to make. I am sure you will enjoy yourself making these. You can use these christmas ornaments for your tree or give them away as gifts. Below is the materials you will need and a tutorial to make the yoyo snowman ornament.

For snowman ornament you will need:

  • Scraps of white fabric for snowman.
  • Scraps of fabric for the hat and the scarf.
  • Small black beads or buttons


From the white fabric cut two circles, one is 4" and the other is 3.5".


Make your two yo-yos. If you are new to yo-yos making, have a look at my tutorial to make yo-yos HERE

Make the hat:
Fold 4"x2.5" rectangular in half, meeting shorter edges. Sew along these edges, backstitching at begining and end.

Press seams open and turn right side out.
Turn one raw edge up to 1/4". And turn up 1/4" again to make the hat brim.
To match the hat fabric and gather the remaining raw edge sew along the hat and then pull gathers tight and tie off.


Stitch together the small and bigger yo-yos together and then add the hat.


Tie scarf around snowman's neck. I used a red fabric. It is 1" wide.


For the eyes and mouth you can use small black beads or you can make some embroidery work. I preferred embroidery for eyes and mouth. For the nose I used a tiny yoyo which is filled inside with fiber.

Now time to add some ribbon or twine to make an ornament. Or you can glue it on a bambu stick.


Thumbling blocks quilt pattern

By Hatun Comak → Tuesday, December 11, 2018

Here is another quilt block I've wanted to try.
I made thumbling  quilt blocks using english paper piecing. The thumbling block template is a diamond shape which is made up of two equilateral triangles. There are other methods of making these thumbling blocks, but for english paper piecing you need paper templates. Besides pre-formed templates, you can form your own template by drawing a diamond shape, or you can just use your hexagon templates by cutting a hexagon into three diamonds. Three diamonds will make a tumbling block. You can download free hexagon templates HERE.


It is important to have three distinct colours of light, medium and dark to have the effect of thumbling blocks. Keep the lightest fabric on top of the block, medium fabric on the left and darkest on the right. This is essential to have 3D effect.

Pin one of the templates to the fabric, cut around the template with 1/2" seam allowence.

Baste around the template with long basting stitches. Some people use glue for basting but I prefer thread basting.

When you have basted three diamonds of a tumbling block, you sew them together, aligning the corners and edges.

If you are new to english paper piecing, tutorial for english paper piecing might be helpful.


These thumbling blocks when finished will turn into a baby quilt for a baby to be born on a few months. These bright colors will be enjoyed by the baby, hopefully. When I finish the thumbling blocks baby quilt, it will also be here.

Update: Thumbling blocks baby quilt is finally finished. It is made for a baby girl and will be gifted soon. You  can see the details below:


Quilting terms: A list of quilting terms that every quilters need

By Hatun Comak → Wednesday, December 5, 2018


Amish quilts: The quilts which are made by or in the style of the Amish quilters in Pennyslvania, or Ohio and Indiana. Geometric patterns and central medallion square-in-a-square with wide borders is a popular design in the Amish community.

Appliqué: A technique where fabric shapes are cut and sewn on to a background fabric or quilt top. Appliqué can be pieced together by hand, machine, or with fusible web. Appliqué is used to prettify or create interest to a block or quilt.

Attic window quilt pattern: A visual illusion quilt pattern which makes it  seem as if you are looking at the quilt block through a window.

Backing: A quilt consists of three layers: quilt top, batting and backing. The bottom layer of a quilt, backing, is a piece of fabric which is usually a single piece.

Bargello: A type of quilt which creates movement by the way of strips of fabric squares are sewn together. Quilters usually use the same colour going from dark to light.

Basting: Long, temporary stitches are used to hold fabric layers together öbefore the final stitching is done. The aim is to hold three layers in place during the quilting process. A quilt is usually basted in sandwich stage before final quilting. The stitches are removed when quilting is completed.

Batik fabrics: A method of dying fabric where some areas are covered with wax or other substance to make designs by keeping dyes penetrating in pattern areas. Hot water is used to remove the wax.

Batting: The middle layer of the quilt between the quilt top and the backing. It provides warmth to the quilt. It is usually made up of cotton, polyester and wool.

Binding: The final stage to finish the quilt. Long, thin fabric strips which is often folded double are sewn over the raw edges after the quilting of the quilt is completed.

Big stitch: A type of quilting where big stitches with colourful threads are used to create a decorative effect.

Block: The basic quilt design unit. A quilt block can either be a single piece of fabric cut into squares or other geometrial shapes or a block which has been pieced  using many pieces of fabric sewn together.

Border: A pieced of fabric or a strip of fabric added to the edges of the quilt, used as a frame. It is sewn outside of the quilt. Borders can be wide or narrow.

Charm quilts: It is a kind of scrappy quilt made with many many scraps  where each piece is a different fabric.The pattern is usually a one patch design. Many quilters trade or swap fabrics with friends in order to collect a variety of fabric for their charm quilt.

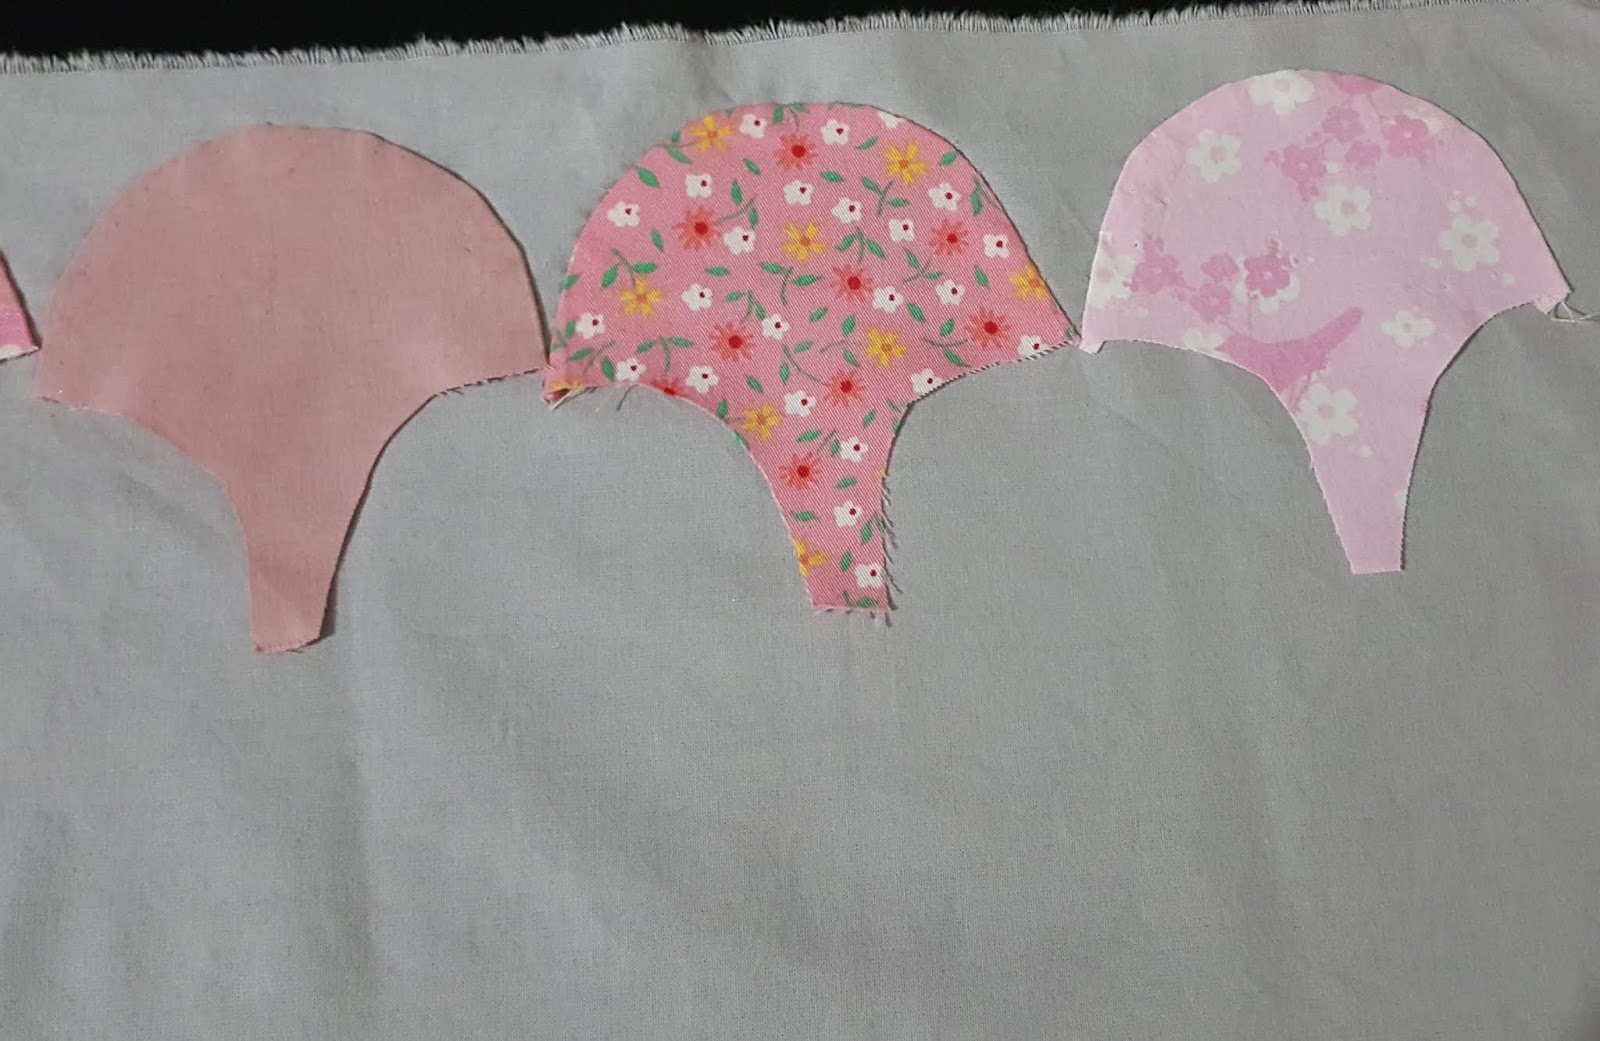
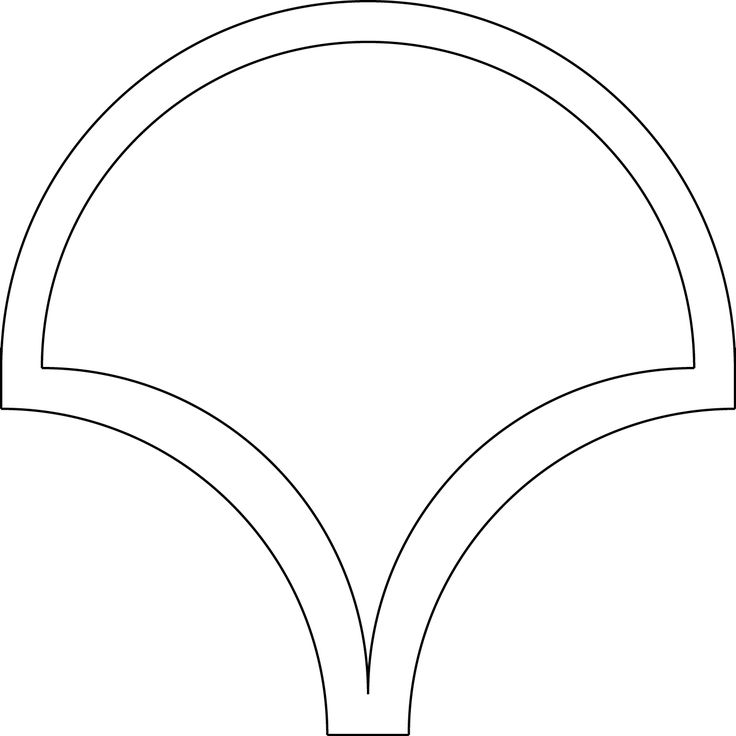
Clamshell: A filming quilting patterns with symmetry and overlapping circular shakespeare, remind you of fish scales. You can create the clamshell design by using a glass or cup to trace.

Crazy quilts: A quilt made randomly from the blocks of odd shapes of scraps sewn together. There is no pre-determined pattern or design. When crazy quilt blocks assembled together, they make a crazy quilt.

Disappearing nine patch: A kind of beginners' quilt, which is made by cutting up a nine patch into four quarters, putting them into different positions and piecing the blocks again. Many layout options are available for this pattern.

Dresden plate: One of the most popular quilts during the 1920s-30s, also known as sunflower, dresden plate is an appliqué quilt with petal shapes that radiate from a center circle.

Electric quilt (EQ7): A computer programme used for designing quilts.

English paper piecing: A method of hand piecing where paper templates are used. Fabric is stabilized over the paper template. One of the most popular english paper piecing pattern is Grandmother's Flower Garden which is made by using hexagons.

Fat quarter(FQ): A half yard of fabric which iÅŸ cut in half again vertically and is now 1/4" yard, measuring 18"×22" and suitable for cutting larger block sizes.

Finger pressing: The technique of pressing with tip of your finger or fingernail along seams to make it lie flat.

Flying geese: A common patchwork pattern where two triangles are pieced onto the sides of a larger triangle so that you create a rectangular piece of patchwork.

Foundation paper piecing: A technique used for joining small pieces of fabric to make a more complicated pattern and design by using numbered paper as a foundation. It assures accurate and stable blocks.

Fussy cut: In order to use the image or motif on the fabric, a specific area of the printed fabric is cut. In this was you get the specific image you want to use.

Half square triangles (HSTs): A triangle is created when a square is cut diagonally. Two half square triangles are obtained from a square.

Irish chain: It is a classical quilt pattern which has several variations. Diagonal squares that only match up at the corner points are the most common. It is great for beginners.

Jelly roll: They have become popular among quilters. Jelly rolls which contain a bundle of pre-cut strips measuring 2.5"x 44" can be got from many different fabric companies or shops.

Layout: The process of arranging and rearranging the blocks and the pieced units to form different looks and decide the final form of the quilt.

Log cabin:  A quilt pattern in which strips of fabrics are sewn together in a numerical sequence around a center square to form a block. Log cabin is a traditional but popular design which has many variations.

Long arm quilting: A kind of sewing machine with a long arm which is used for quilting. A quilter may use her free motion skills with this machine.

Machine appliqué: The process of sewing fabric motifs on the fabric using a sewing machine.

Memory quilts: The quilts which are made to remember people or events that are significant in their lives. These quilts usually include clothes, such as T-shirts, baby clothes, from the ones that the memory quilt is attributed to.

Mug rug: A mini quilt similar to a coaster.

Mystery quilt: A kind of quilt pattern written in seperate sections and disclosed one section at a time in order to hide the completed quilt. It is usually preferred for group projects.

Nine-patch: A quilt block that includes nine squares of patches arranged in three rows horizontally. It is perfect for beginners, easy to make.

Needle-turn appliqué: It is a traditional hand appliqué technique in which seam allowances are turned under while sewing the motif to the background, as a result you have invisible stitches.

Outline stitch: A decorative stitch used in embroidery which forms a narrow line.

 Panel quilt: A pre-printed fabric panel, a large piece of fabric printed with some kind of picture or scene, is used to make a quilt. These fabric panels are ready to use as quilt tops, so there is no need to cut them up for patchwork.

Patchwork: The process of sewing many small pieces of fabric together to make a larger fabric or design for a quilt top.

Pinwheel: A quilt pattern block which includes four triangles that are arranged in a pinwheel pattern.

Pre-cut fabric: Type of fabric bundles which are pre-cut by the manufacturers. Jelly rolls, fat quarters are some examples of pre-cut fabrics.

Pressing: An iron is used to press seams and blocks. You do not move iron forth and back or use steam, which would cause stretching or distortion of seam. Pressing is necessary for obtaining precision in quilting.

Quilting: The process of sewing the three layers of quilt together.

Quilt sandwich: The layering of the quilt top, batting and backing together. This is the last step of quilting.

Rag quilt: A kind of piecework where seams are exposed on the front and finished seams on the back to have a ragged look.

Raw edge: The unsewn edge of the fabric which is sometimes used decoratively.

Rotary cutter: A tool with a sharp circular blade with a handle used to cut fabric on a cutting mat, preferably by using a ruler.

Sashing: Strips of fabric sewn around or between the patterns or blocks, framing them and making the quilt larger.

Scrap quilt: Quilts that are made from leftover fabrics from other quilt projects. There are some patterns for this style of quilt or you just sew scraps together randomly and then cut them in to blocks.

Seam allowance: The width of  fabric on the right of the sewing line.This is usually 1/4" in quilting.

Stash: The term refers to the quilter's collection of fabric, which is usually a big amount.

Stitch in the ditch: It is a method of stitching that is used next to the seams in a quilt in order to define blocks or shapes.

Sunbonnet Sue: An appliqué design of a girl hiding her face behind her sunbonnet. The design has been around since 1920s and still popular among quilters.

Template: A shape or design cut from a cardboard and placed on fabric and used as a pattern to trace piecing or appliqué pieces.

Unfinished objects (UFOs): Quilt projects that you have started but haven't finished yet. It is quite usual for quilters have many of them.

Walking foot: A kind of foot that you attach to a sewing machine so that it can help you feed the quilt through more evenly.

Wonky: In this type of patchwork fabric pieces are cut at awkward angles and sewn together with no rhyme or reason.

Y-Seams: A sewing technique where three different pieces of fabric are joined together to form a "Y".

Yo-yo quilt: A kind of fabric embellisment made by using three dimensional circle.


how to make fabric yo-yos: an easy tutorial

By Hatun Comak → Friday, November 30, 2018

Today I'd like to share how I make fabric yo-yos. These yo-yos are perfect to be used with anything from wearable accessories, bags, hommade decoration and for quilts of course. They are perfect to embellish anything. Making the yo-yos is so simple and just takes a little time to finish. Then you can use them anywhere you like.
Here I provide an easy tutorial to make fabric yo-yos.

To begin, prepare your own yo-yo size template. Draw a circle in a white cardstock and cut it out. Keep in mind that the finished size of the yo-yo is almost half size of the paper template. So the template needs to be over double the finished size.While drawing the circle, I used a glass which provides a perfect circle.


Place the template on the wrong side of the fabric, using a washable ink marker. Cut the circle out using your scissors.

Fold under the outer edge to 1/4", using a running stitch to stitch along the outer edge.


Continue stitching with a runnning stitch until you have gone all around the circle.


Pull the thread tight cinching up the center.


Cinch the center tight and take the thread to the back, stitch a few times. These stitches won't be seen.

The hole will be centered and all the edges will be pushed out.
When you have a bunch of them sewn up, they are ready to be used up. Enjoy it!

10+ free christmas quilt patterns

By Hatun Comak → Monday, November 19, 2018

If you are looking for inspiration, or haven't decided your Christmas quilt project, check out the following 10+ free christmas quilt patterns that I have found and checked the link ıf it works.  These patterns range from simple patchwork to more advanced, with a variety of quick projects and others with time requirements. I mostly chose simple designs, which are quick to make since there is not much time left for christmas. I haven't started my christmas quilt project yet, but one of these awesome quilt patterns will absolutely be made.

Sooo here we go:
  1. Modern christmas tree quilt block by Amy Smart


The first reminder of christmas is pine trees of course. So this christmas tree quilt block comes first in the list.


This Christmas tree skirt is adorable and there is a tutorial in the link above.

3. Triangle star quilt block tutorial by Amy Smart


If you would like to make something for Christmas but the time is limited, these pillows are perfect for you.

4. Holiday applique coasters by We all sew


These coasters are not only decorational but also functional and perfect as gifts also. Free tutorial and pattern to download in full size.

5. Treelicuous Christmas Pillow by Jedi Craft Girl


A colorful pillow with three different Christmas trees.

6.Christmas tree mug rug


A great gift for a friend or family member.

7.Advent calendar quilt by Ahhh quilting


This quilt is adorable. Definitely on my to do list.

8. Sweet Sue tops the tree by Sew hooked


 This is a 12" paper piecing pattern with free template. Isn't is cute?

9. Trees and Stars by Bomquilts


This is a paper pieced lap quilt finishes at 50" square.

10. Coming Home free Christmas quilt pattern by Jacquellyne Steves


The finished size of this quilt is 36x44"

I hope you can find an appropriate pattern for you. I'd love to see yours as well.Whatever you do, enjoy it!

clamshell quilt pattern tutorial

By Hatun Comak → Tuesday, November 13, 2018

Clamshell quilts have long been in my quilts-to-do list. They all look gorgeous with many variations. Finally I had the time to start mine with a traditional one. When I searched through internet, I encountered various ways, methods of doing clamshell quilts. Seeing various methods, I chose the one way that I found easiest and then prepared my tutorial which seemed the most practical to me.   If you are also planning to give a try, why don't you start from here then? And I'd like to know if you've found it useful or not?

How to make a clamshell quilt

  1. For clamshell quilt templates, you can prepare your own or use a ready made free clamshell quilt template. I printed out the template reducing its size 50% so it becomes 2". You can reduce or enlarge it according to your desire.                                                                                    
                                  
  2. Cut the fabric 1/4 inch larger than the paper template.                                                                             
  3. Place the template on the wrong side of th e fabric. 
  4. Baste the top curved edge, using long basting stitch. Or you can just use fabric glue instead of basting. Here I preferred basting.                                                                                                     
  5. Press the edge over with iron. Make sure that there are no points on the curve. After ironing and giving the round shape,  remove the template.                                                                          
  6. When you have prepared the clamshells, it is time to put them together.

  7.  There are various methods you can use, here I preferred applique method to put the clamshells together. Applique the top curve into place on the foundation fabric. With the applique method, stitch a row at a time.
  8. The next row will lay on top of the bottom curve of the row above.
I haven't finished assembling the pieces, it is stil work in progress. I am planning to make it a cushion. As soon as I have finished it, I will be sharing it. I like making clamshell quilt pattern and next planning a baby quilt with clamshells. Yay it is exciting!

folded star potholder tutorial

By Hatun Comak → Tuesday, November 6, 2018

Folded patchwork star is made by folding and layering fabrics together, which makes it look like fabric origami. It looks great but complicated to make , however it has a simple technique. The star design looks perfect for place mats, mug rags, pot holders or any kind of decoration. It is also great to use your fabric stash.
If you are one of those that see this folded star pattern and admire it but think that it is hard to do, this tutorial is for you. Why don't you give a try to this technique which is quite simple?

The finished size of the pattern is 7"x 7"

Requirements

  • Cut 2 of 8"x 8" squares; one for background and one for backing.
  • Cut 5 of 3"x 3" squares (Row 1)
  • Cut 8 of 3.5"x 3.5" squares (Row 2)
  • Cut 8 of 4"x 4" squares (Row3)
  • Cut 4 of 4.5"x 4.5" squares (Row 4)
  • Cut 4 of 5"x 5" squares (Row 4)

Instructions

Step 1. Take your  one of 8" square fabric. This is going to be your foundation piece. Fold it in half diagonally, finger press or press with iron, fold again diagonally and press. So you will get the lines on fabric as in the image below.


Use a ruler and pencil or a marking pen to highlight the fold lines.


Again mark along the center lines, 11/2 "2 1/4"3", 3 3/4". These will be the placement lines.


Step 2. Take one of the 3" squares and fold in half, fold in half again and press. Then take the two centers and fold towards the pressed center line. You need to have a small gap down the center line for your folded tiangle. Repeat the process for the three more squares, leaving one square. Below you can see the steps of folding through a triangle.


Place the 3" square over the center of the background fabric matching the first marks. So you do not see the base fabric.


Place your four folded and ironed triangles and match the raw edges with the first marks. Make sure that your guidelines line up with the folds in your triangles. Pin in place.


Stitch the four triangles to the background fabric as shown below.


Step 3. Take your 3.5" squares(here green). Fold your squares again to make triangles, using the same method in Step 2. Place the four folded triangles with the center fold matching the secong marks. Place the other four folded triangles with the center fold along the diagonal line, half inch away from the center point.


Pin in place and edge stitch around the raw edges. It will look like the image below.


Step 4. Take your 4" squares, which are red in my pattern. Fold your squares to make triangles, using the same method as mentioned above. Place the first four folded triangles with the center fold matching the third mark on the background fabric. Then place the other four folded triangles with the center fold along the diagonal line. They should be 1" away from the center point. Pin in place and edge stitch around the raw edges.

Step 5. Take your four  4.5" squares (mine are green). Fold squares to make triangles as mentioned in Step 2. Place these four folded triangles with the center fold matching the next line on the background fabric.

Step 6. Take a 5" square and fold it in half diagonally and press with iron, fold in half again and iron. Then take the two corners and fold them through the center line. You will get a square shape. The same as the folded triangles, you need to have a small gap down the center line for the folded square. Repeat the same process for the other three 5" squares. Have a look at the image below.

Place the folded squares with the center fold along the diagonal line, 1.5" away from center point. Pin in place and edge stitch around raw edges.

Step 7. Trim the square to 7" and cut also the backing to7". Place the backing square underneath your folded star, wrong sides together. You can also add batting at this point but the mat is quite thick. Stitch across the math through the folded points.

Step 8. Add the binding.
Your folded star has been completed.


BONUS: Below you can find more quilt blocks with tutorials. We always need inspiration. Hope you get it here.