Browsing "Older Posts"

english paper piecing hearts

By Hatun Comak → Thursday, January 31, 2019

Here is another valentine project with these cute english paper pieced hearts. Hearts are made with jewel paper pieces which are one of the easiest EPP projects that is perfect for beginners. Two jewels sewn together makes a heart that is so cute. I worked with 2.5" jewels (along the long sides). I prepared my own template, which is so easy to me.

I used a 2.5 " hexagon to make the jewel paper piece. The three sides of the hexagon measures 1.25". You draw two lines down from the two bottom sides of the hexagon using a ruler and cut out the paper template. I use this as template to draw more jewels for paper piecing.
 I use ordinary paper for jewel paper pieces.


Then I cut diamonds from fabric. This is how they look from front and back. Since it is a valentine project I used red and pink in making the hearts.


If you are new to English Paper Piecing (EPP), TUTORIAL FOR ENGLISH PAPER PIECING might be helpful for you.


Jewels are pinned and thread basted, ready to make hearts. Two of the jewels are sewn together to make one heart.


 You can arrange hearts in different shapes, below are some arrangement. Which do you like best?


English paper piecing is fun and so relaxing. Jewel paper pieces are as good as hexagons, that gives you chance to play with the pattern. 

Enjoy It!

Valentine's day mug rug

By Hatun Comak → Monday, January 21, 2019

I've been thinking of what to make for upcoming Valentine's day as a quilt. Since I'm a quilt addict, to me every special day means making quilts related to that day. So I've started with this adorable mug rug which is made of two hearts filled with love. This Valentine mug rug didn't take much time to make so you can also have a lot of time enjoying your coffee and then making them for your beloved friends!


I prepared a simple tutorial here for you, I've tried to make it as simple as possible. I used paper pieced heart pattern for this mug rug. First of all, you need to download the pattern below.

FREE TEMPLATE DOWNLOAD

The paper template is used for foundation paper piecing which is my favourite technique since it gives perfect results. There are four pattern blocks in one paper, so you can make two mug rugs of that template.

Cut out your paper templates. The interior part A2 and A4 is the heart shape and here I used red colour, for the other parts I used white solid fabric.

If you are not familiar to foundation paper piecing, it may be a good idea to start with a simpler pattern. Before starting this valentine mug rug, you may like to have a look at my FOUNDATION PAPER PIECING TUTORIAL

The numbers on the template show the order of the fabrics to be sewn. For one mug rug you need to make two of the heart pattern.


When you finish sewing your patterns, you add sashing and border. I preferred to use white solid fabric.

Now it is ready for quilting. We make the quilt sandwich and then quilt it.


Finally you do the binding and it is ready to enjoy your coffee.


The first one I made is mine and the others will be coming soon to be gifted.


Enjoy your time!

7 easy quilt patterns for beginners

By Hatun Comak → Tuesday, January 15, 2019

If you are new to quilting and have never made a quilt before, you may not know where to start. Here are a few simple tutorials to get you help started. These are not only simple but also beautiful quilt patterns for beginners. If you are looking for an easy quilt pattern suitable for a beginner, you are at the right place.
For beginners, it is a good idea to choose a quilt pattern with large pieces of material or start with a small quilt, like a baby quilt or lap quilt. It is important to choose a simple design so that you do not get frustrated. Once you start, you will see that it is not that difficult to make a quilt.

If you are a more experienced quilter and looking for a quick weekend project, these quilt patterns are good for all experience levels.
Ready to start? Check out some of the beginner friendly quilt patterns that I have collected here. They are written with detailed instructions and illustrations that help you follow the each step in a clear manner.

 Enjoy your time!


Puff quilts also known as biscuit quilts and they are super cute and comfy. At first look, it may seem daunting to make it but this puff quilt has a simple technique to make and the result is perfect.


Baby quilts are perfect for beginners, since their size is easier to handle. 


Easy Rag Quilt Pattern

Rag quilts are so easy to make and they go together quickly and you needn't worry about perfect seams. This rag quilt can be completed in a day or two and perfect to be your first quilt.


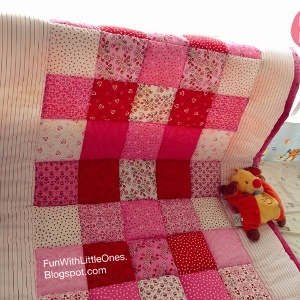
This looks great with pink colours, perfect for baby girls. Do not worry if your is boy. You can just change the colour to blue or green.


Quick to put together and perfect for beginners and it looks great with that bright colors.


carpenter's star quilt block pattern and tutorial

By Hatun Comak → Thursday, January 10, 2019

Quilting is just so fun and once you start, you can' t stop. Beside many ongoing projects I can 't stop myself beginning a new one. Carpenter's Star quilt is my latest favourite and just love it. It has some other names and variations, one of which is carpenter's wheel.

I prepared  tutorial of how to make carpenter's star quilt pattern.  It consists of 64 pieces for 18" finished size.

In fabric choices make sure that you have a good contrast between the background fabric, medium fabric and the dark fabric to ensure th e design of the pattern will stand out. The nice outcome of the pattern depends on your colour choices, so be careful while you are choosing the fabrics.

 The image below shows how the block goes together. Before I start making the block, I usually draw it on paper and colour it, just to see the color combinations and this also helps me figure out the layout. I like to draw, anyway.


For carpenter's star quilt block pattern I chose yellow as background fabric, lila as light fabric and purple as dark fabric. Below is the blocks that you will need. After cutting and making your HSTs (half-triangle squares), you will have these number of blocks as shown in the image below.


Cutting instructions:

  • 16 yellow squares at 2.75"x2.75"
  • 8 yellow squares at 4.5"x4.5"
  • 8 lila squares at 4.5"x4.5"
  • 8 purple squares at 4.5"x4.5"
Sewing instructions:
  • Place your yellow 4.5" square on top of your purple 4.5" square, right sides together. Sew around your square using 1/4" seam allowence. Repeat this process with four yellow/purple combo and 4 yellow/lila combo and 4 lila/purple combo. 

  • Cut your square on each diagonal as shown in the image below. This will give you 4 HSTs per one set. Repeat this with your other squares.

  • Here comes the most tedious part to me. We need to square these blocks to 2.75"x2.75". It is important because if you do not square them up, you will not have a nice square block. So this part is tedious but important.
  • Open seams of HSTs, which will be 2.75"x2.75"  and press with iron.
  • Layout your pieces following the diagram at the top. 
  • Start sewing from column 1 by putting it on column 2, right sides together. Chain sew, using 1/4" seam allowence.
  • Repeat sewing the blocks together until all your columns are sewn.
  • Press each row in opposite directions. Dont forget to opel seams.
  • Take row one and flip it over row 2, right sides together. Pin each seam, make sure that the seams are going in opposite directions.
  • Sew using 1/4" seam allowance. Continue to sew the rows together until the block is completed.

Now I have a beautiful 18" Carpenter's Star quilt block! I like the result. I hope you enjoyed this tutorial. What do you think? Let me know your opinions and show me your Carpenter's Star quilt pattern blocks.